
dee4doa
Member
I'm back and I've had a great idea, I've made this thread to condense all my modding finding and tutorials here so that it's easier to have all the guides here instead of scattered around other places.
DEAD OR ALIVE 2 Modding Tutorials: (ver. based on 1999 DOA2)
Compatible Versions:
-SEGA NAOMI
-SEGA Dreamcast
-PlayStation 2*
* Can only use a cheat engine to modify offset values, files can't be altered,swapped or accessed!
DEAD OR ALIVE 2: ULTIMATE Modding Tutorials: (XBOX) (with help from usagiZ, thank you!)
Compatible Versions:
-XBOX
-XBOX 360 (Backwards compatibility)
-CXBX-R (XBOX emulator for PC)
-DEAD OR ALIVE ONLINE PC (All game files are the same, except 3D model files)

The highlighted section controls the random encounters you get during story mode. I was able to change some values to get cutscene characters to show up.
4 = Zack
8 = Tina
C = Jann Lee
10 = Ein
14 = Hayabusa
18 = Kasumi
1C = Genfu
20 = Helena?
24 = Leon
28 = Bass
2C = Maria - Helena's Mom (can replace files)
--
2E = Leifang
32 = Ayane
36 = Young Bass (can replace files)
--
38 = Loran/Lauren/ (can replace files)
3A = Tengu
3E = Young Tina
--
--
40 = Hitomi
--
44 = Prairie Dog
46 = Bayman
--
--
--
The Result:
 Useful/Universal Information:
Information thanks to usagiZ

The blue marking is the start of the move-definitions (first pointer 88 00 00 00 leads here)
BIN HEADER: (all pointers)
OFFSET 1 0x0 = Move-Definitions
OFFSET 2 0x4 = Input-Definitions Offset Table
OFFSET 3 0x8 = Move Properties (normal,counter,guard,crouching,air, damage, frame data,open/closed stance)
OFFSET 4 0xC = Holds Definitions (which move-def slot to use for each hold)
OFFSET 5 0x10 = ?
OFFSET 6 0x14 = Throws?
OFFSET 7 0x18 = Throw Positioning / damage pointers
OFFSET 8 0x1C = Hold positioning / damage pointers
OFFSET 9 0x20 = Character-Specific Property Definitions
OFFSET 10 - 13 (usually all the same) 0x24 - 0x30 Unknown
OFFSET 14 0x34 = Unknown
OFFSET 15 0x38 = Unknown
OFFSET 16 0x3C = Unknown
OFFSET 17 0x40 = Unknown
OFFSET 19 0x44 = Unknown
OFFSET 20 0x48 = Unknown
OFFSET 21 0x4C = Unknown
OFFSET 22 0x50 = Unknown
OFFSET 23 0x54 = Anim-Def Pointer Table
OFFSET 24 0x58 = Blank (Usually)
OFFSET 25 0x5C = Unknown
OFFSET 26 0x60 = Unknown
OFFSET 27 0x64 = Unknown
OFFSET 28 0x68 = Unknown
OFFSET 29 0x6C = Unknown
OFFSET 30 0x70 = Unknown
OFFSET 31 0x74 = Unknown
OFFSET 32 0x78 = Unknown
OFFSET 33 0x7C = Unknown
OFFSET 34 0x80 = Unknown
OFFSET 35 0x84 = Unknown (this one only exists if the file starts with 88 00 00 00)
W.I.P Tutorials: (not researched and/or need help!)
-Editing Movesets (DOA2,DOA2U and DOA3)
-Creating custom movesets (DOA2,DOA2U and DOA3)
-Converting movesets
-3D model importing/exporting (DOA2,DOA2U and DOA3)
DEAD OR ALIVE 2 Modding Tutorials: (ver. based on 1999 DOA2)
Compatible Versions:
-SEGA NAOMI
-SEGA Dreamcast
-PlayStation 2*
* Can only use a cheat engine to modify offset values, files can't be altered,swapped or accessed!
How to change the title screen stages!
With this you can choose your selected or favorite stages/cutscene instead of the boring defult stages that load up.
1st Open up your 1ST_READ.BIN file with a hex editor, then goto the offset 1d062d:
That is where the stage values are kept that load up the stage each value means a different stage.
In this case the number values are: 00 14 15 09 0c 0f 00 05 18 0a 00
As you can see the list below, normally the game loads the following stages - The white storm, The Spiral, The Dragon Hills etc.....
Stage Values:
Orange = Dreamcast/NAOMI+PS2
BLUE = PS2 ONLY (Files don't exist on DC/NAOMI)
00 - The White Storm
01 - The Aerial Garden (Night)
02 - The DangerZone 2 (Survival)
03 - The Ice Cavern
04 - Helena's Burning Cutscene
05 - The Death Vally
06 - Test Stage
07 - Test Stage 2
08 - The DangerZone 2 (Sparring+Tag Battle)
09 - The DangerZone
0a - The Great Opera
0b - The Great Opera (Lower Balcony)
0c - The Demon Church
0d - The Demon Church (Lower Level)
0e - Kasumi Cloning Cutscene
0f - The Aerial Garden (Daytime)
10 - The Aerial Garden (Lower - Day)
11 - Elevator Cutscene
12 - The Miyama
13 - The Koku-An (PS2 ONLY)
14 - The Spiral
15 - The Dragon Hills
16 - Kasumi moon water cutscene (PS2 NTSCJ HARD*CORE)
17 - Bass's Ally Stage
18 - The Bio-Lab
19 - Leon's Desert
1a - The Aerial Garden (Lower - Night)
1b - The Miyama (Snowing)
1c - Young Tina Cutscene Stage
1d - Bass's Living room
1e - The Dragon Hills (Lower Level)
1f - The Prairie (PS2 ONLY)
20 - Desert Truck Cutscene (PS2 ONLY)
21 - The Crimson lower (PS2 ONLY)
22 - The Aerial Gardens sunset (PS2 ONLY)
23 - lower garden (PS2 ONLY)
24 - The D Octogon (PS2 Only)
25 - The Pancratium (PS2 ONLY)
26 - The Iron Hell (PS2 ONLY)
27 - The Blanca (PS2 ONLY)
28 - L's Castle
29 - The Buida Zehn
2a - The Buida Zehn (Lower Level)
2b - Bamboo Cutscene
2c - The Iron Hell again? (PS2 ONLY)
2d - Ein Dojo cutscene (PS2 NTSCJ HARD*CORE)
ANYTHING PAST THIS CRASHES!
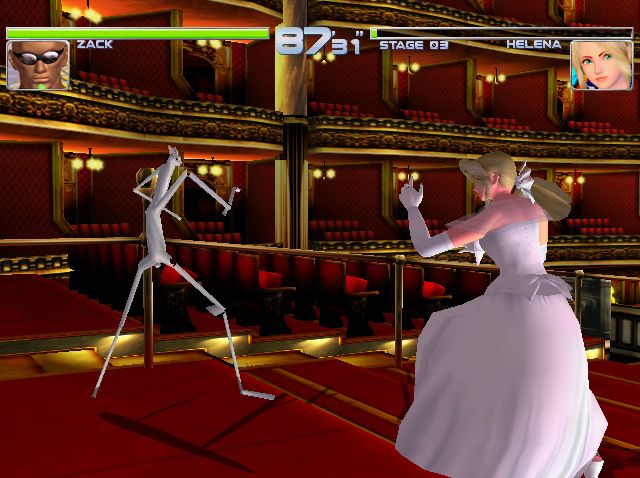
How to swap stages!
Yes another discovery I have made, finally we are able to swap whatever stage you want without it being "compatible" or if it loads up correctly. This tutorial is how to correctly swap stages!
THIS DOES NOT CHANGE THE STAGES THAT LOAD UP STORY MODE!
1st open the 1ST_READ.BIN and go to the offset 174056:
Each value for the stage is seperated by the value '00' there are 12 stages in total.
With the stage list showing me which values I should replace, I decided only to swap "The Dragon Hills" stage which the value for that stage was the 10th value '15' So I changed the value '15' to '1b' (which from the list below, that number means it will load up Zack's ending stage)
The Result
The game loaded up Zack's ending stage which replaced "The Dragon Hills" stage:
How to swap stages/cutscene stages in Story Mode
Also be aware that these values change the cutscene stage only!
170664- Helena's Cutscene 1 stage (Dragon Hills)
1706ad - Ein vs Helena Cutscene stage (Spiral)
Once you have changed the cutscene stage, you need to change the value of the Story Mode stage values that load up playable ingame. The reason for this is that it stores the hex values for the stage of the cutscene in a different part of the 1ST_READ.BIN.
If you just swap either the cutscene stage or just the ingame stage, the game will load up the cutscene in a stage then when the fight begins the game will teleport to the stage you changed.
So make sure you change both values when you want to completly swap a stage in story mode or they will magically get transported to another location!
Character Story Mode Stages (Not Cutscenes) (offsets Still W.I.P, need the rest of the characters)
175244 - Jan-Lee
175249 - Ein
175252 - Hayabusa
175256 - Kasumi
175265 - Helana
17526e - Leon
17527a - Lei-Fang
175282 - Ayane
Once you goto the offset of your desired character's stages, you will see that there are a different amount of stage values for each character (one two valued hex number means one stage). The reason for this is that different characters have more cutscenes than others, but if you are still thinking-
"Why are there only 4 values for *Insert characters name* if in story mode there are 7 stages, shouldn't every character have 7 hex values for the stages that load up in story mode?"
No, this is because if that character only has three hex values then this is because those stage hex values are 'Destined' for that character in that specific stage.
Example
Helena has six stage values:
15 09 14 01 0a 12 -
each value means that the 'destined' stage will load up in that order in story mode. So from these values it should load up: The Dragon Hills, The DangerZone, The Spiral, The Arial Garden (Night) etc. But there is one value missing, this means there is one stage that is selected at random. This applies to all characters, if they only have a certain number then the other stages are selected randomly and cannot be changed.
How to swap character costumes!
Yes Iv finally done it! How to swap any costume you want without thinking of the problems with "Compatible costume slots" which now you can learn how to edit the costume slot compatability with this tutorial!
1st open the 1ST_READ.BIN with a hex editor, then search for the numbers "123456789" and it will link you to some hex values which look like these:
Each costume starts at value "fe" and ends with value "ff" here I have made a list of Kasumi's for an example:
Choose the costume slot value you want to swap with another costume (im swapping KAS07 with KAS04 now copy the hex values from one costume slot onto the one you want and then save it!
Also don't forget you need to swap the normal costume files aswell, so I had to replace the KAS07 files with the KAS04 files (APV,BIN,CHR,SUP,ACS) In addition if you are planning to swap a costume slot and you find that the hex values for that slot is shorter than the one you are replacing (e.g KAS04) then you need to replace the values to 00 and then insert the other hex values near the bottom.
Characters select values:
173f48 - Characters
Character values:
05 06 01 00 02 0D 18 04 07 09 08 0C 03
00 Zack
01 Tina
02 Jann Lee
03 Ein
04 Hayabusa
05 Kasumi
06 Gen Fu
07 Helena
08 Leon
09 Bass
0A Helena's mother*
0B (Placeholder)
0C Lei Fang
0D Ayane
0E Young Bass *
10 Roland *
11 Tengu **
12 (Placeholder)
13 (Placeholder)
14 (Placeholder)
15 (Placeholder)
16 Random Select
17 Rabbit*
18 Bayman
* not meant to be playable, will crash if you do anything (move around, attack, etc.)
** invisible models when playing time attack/story mode
I want to thank the guy on youtube fkualol for sending me this information So don't forget to thank him on youtube!
LOL I had to find the character offset myself though because he used the US version and I'm using the Japanese Limited Edition though to my dissapointment, Helena's mother and also the other NPCs did not have their own character portrait in this version.
They all use portraits from existing characters (Helenas Mum uses Bayman's, Loran uses Leifang's etc) maybe Tecmo had to delete some of the portraits because they were never going to be used and they could make more room for new costumes by deleting them.
DEAD OR ALIVE 2: ULTIMATE Modding Tutorials: (XBOX) (with help from usagiZ, thank you!)
Compatible Versions:
-XBOX
-XBOX 360 (Backwards compatibility)
-CXBX-R (XBOX emulator for PC)
-DEAD OR ALIVE ONLINE PC (All game files are the same, except 3D model files)
The stuff circled in red are the stage values, each are selected at random and then are played in the match. This means that the value '00' is first here, but this doesn't mean that the game loads the Snow Stage first!

00 WHITE STORM (GL1)
01 AERIAL GARDEN night(AG1N) +
-02 DANGERZONE survival bonuses(DS2)
03 WHITE STORM cave (GL2)
(04 test? (low))
(05 _WA !!)[shine] --
-06 test level!
(07 _WAL !!) test wals
08 CRIMSON (KL1)
09 DANGERZONE (DS1) +
0A GREAT OPERA cave (OH1)(flickering floor glitch)
0B GREAT OPERA (OH)
0c (42..)DEMON'S CHURCH (SN) +
-0d DEMON'S CHURCH down (SN2) +
(0e _AM !!)[shine] --
0f AERIAL GARDEN +
-10 AERIAL GARDEN down +
(11 _EL !!)city elevator
12 MIYAMA (MI) +
13 KOKU AN [_NK Limit Dojo] +
(14 _MO !!)[shine] --
15 DRAGON HILL
-16 test level bright
(17 _BP !!) bass tina's poster
18 DOATEC Laboratory
(19 _GL1Z !!) leon's desert
-1a AERIAL GARDEN down night +
-1b test hill black(MISP)
(1C _GC !!) young tina stage
(1D _TF !!) tina's home movie
-1e DRAGON HILL down
1f PRAIRIE [_PR Prairie] +
(20 _TR !!) truck
-21 city(down)
-22 blackout(white point)(AG1S+AG2S) --
-23 blackout? (AG2S) --
(24 _AL !!)[shine] --
(25 _COL !!)[shine] --
(26 _OL !!)[shine] --
(27 _SA !!)[shine] --
(28 _KK !!)[dark] --
29 BURAIZENIN +
(2a _TE2 !!) --
(2b _HT !!) bamboo forest
(2c _OL2 !!) --
(2d _TF2 !!) --
(2e _DJ !!) dojo
(2f _KM !!) montane flower
30 YOZAKURA +
31 ISLAND +
32 SHRINE
33 RAY HOUSE (doa2ultimate) +
34 SAFARI (SV) (with uknown error) savana here!!!
35 GREAT WALL (chinese)
36 AQUARIUM
37 DOWNTOWN
38 CYCLOTRON
39 SUSPENSION BRIDGE
(3a _EFC !!)[normal] --
(3b _EF2 !!)[normal] --
(3c _EAR !!)earth
(3d _WL2 !!)test hill
(3e _WL3 !!)test hill
3f MIYAMA SPRING
40 MIYAMA AUTUMN
41 MIYAMA WINTER
The Result: The game loaded the WALL TEST '07' stage.
OFFSET 687648 = 09 37 38 33 36 FF
TAG Battle selecst 5 stages at random, below is a full stage value list: (You can use single stages!)

00 WHITE STORM (GL1)
01 AERIAL GARDEN night(AG1N) +
-02 DANGERZONE survival bonuses(DS2)
03 WHITE STORM cave (GL2)
(04 test? (low))
(05 _WA !!)[shine] --
-06 test level!
(07 _WAL !!) test wals
08 CRIMSON (KL1)
09 DANGERZONE (DS1) +
0A GREAT OPERA cave (OH1)(flickering floor glitch)
0B GREAT OPERA (OH)
0c (42..)DEMON'S CHURCH (SN) +
-0d DEMON'S CHURCH down (SN2) +
(0e _AM !!)[shine] --
0f AERIAL GARDEN +
-10 AERIAL GARDEN down +
(11 _EL !!)city elevator
12 MIYAMA (MI) +
13 KOKU AN [_NK Limit Dojo] +
(14 _MO !!)[shine] --
15 DRAGON HILL
-16 test level bright
(17 _BP !!) bass tina's poster
18 DOATEC Laboratory
(19 _GL1Z !!) leon's desert
-1a AERIAL GARDEN down night +
-1b test hill black(MISP)
(1C _GC !!) young tina stage
(1D _TF !!) tina's home movie
-1e DRAGON HILL down
1f PRAIRIE [_PR Prairie] +
(20 _TR !!) truck
-21 city(down)
-22 blackout(white point)(AG1S+AG2S) --
-23 blackout? (AG2S) --
(24 _AL !!)[shine] --
(25 _COL !!)[shine] --
(26 _OL !!)[shine] --
(27 _SA !!)[shine] --
(28 _KK !!)[dark] --
29 BURAIZENIN +
(2a _TE2 !!) --
(2b _HT !!) bamboo forest
(2c _OL2 !!) --
(2d _TF2 !!) --
(2e _DJ !!) dojo
(2f _KM !!) montane flower
30 YOZAKURA +
31 ISLAND +
32 SHRINE
33 RAY HOUSE (doa2ultimate) +
34 SAFARI (SV) (with uknown error) savana here!!!
35 GREAT WALL (chinese)
36 AQUARIUM
37 DOWNTOWN
38 CYCLOTRON
39 SUSPENSION BRIDGE
(3a _EFC !!)[normal] --
(3b _EF2 !!)[normal] --
(3c _EAR !!)earth
(3d _WL2 !!)test hill
(3e _WL3 !!)test hill
3f MIYAMA SPRING
40 MIYAMA AUTUMN
41 MIYAMA WINTER
TAG Battle selecst 5 stages at random, below is a full stage value list: (You can use single stages!)
00 WHITE STORM (GL1)
01 AERIAL GARDEN night(AG1N) +
-02 DANGERZONE survival bonuses(DS2)
03 WHITE STORM cave (GL2)
(04 test? (low))
(05 _WA !!)[shine] --
-06 test level!
(07 _WAL !!) test wals
08 CRIMSON (KL1)
09 DANGERZONE (DS1) +
0A GREAT OPERA cave (OH1)(flickering floor glitch)
0B GREAT OPERA (OH)
0c (42..)DEMON'S CHURCH (SN) +
-0d DEMON'S CHURCH down (SN2) +
(0e _AM !!)[shine] --
0f AERIAL GARDEN +
-10 AERIAL GARDEN down +
(11 _EL !!)city elevator
12 MIYAMA (MI) +
13 KOKU AN [_NK Limit Dojo] +
(14 _MO !!)[shine] --
15 DRAGON HILL
-16 test level bright
(17 _BP !!) bass tina's poster
18 DOATEC Laboratory
(19 _GL1Z !!) leon's desert
-1a AERIAL GARDEN down night +
-1b test hill black(MISP)
(1C _GC !!) young tina stage
(1D _TF !!) tina's home movie
-1e DRAGON HILL down
1f PRAIRIE [_PR Prairie] +
(20 _TR !!) truck
-21 city(down)
-22 blackout(white point)(AG1S+AG2S) --
-23 blackout? (AG2S) --
(24 _AL !!)[shine] --
(25 _COL !!)[shine] --
(26 _OL !!)[shine] --
(27 _SA !!)[shine] --
(28 _KK !!)[dark] --
29 BURAIZENIN +
(2a _TE2 !!) --
(2b _HT !!) bamboo forest
(2c _OL2 !!) --
(2d _TF2 !!) --
(2e _DJ !!) dojo
(2f _KM !!) montane flower
30 YOZAKURA +
31 ISLAND +
32 SHRINE
33 RAY HOUSE (doa2ultimate) +
34 SAFARI (SV) (with uknown error) savana here!!!
35 GREAT WALL (chinese)
36 AQUARIUM
37 DOWNTOWN
38 CYCLOTRON
39 SUSPENSION BRIDGE
(3a _EFC !!)[normal] --
(3b _EF2 !!)[normal] --
(3c _EAR !!)earth
(3d _WL2 !!)test hill
(3e _WL3 !!)test hill
3f MIYAMA SPRING
40 MIYAMA AUTUMN
41 MIYAMA WINTER
The highlighted section controls the random encounters you get during story mode. I was able to change some values to get cutscene characters to show up.
4 = Zack
8 = Tina
C = Jann Lee
10 = Ein
14 = Hayabusa
18 = Kasumi
1C = Genfu
20 = Helena?
24 = Leon
28 = Bass
2C = Maria - Helena's Mom (can replace files)
--
2E = Leifang
32 = Ayane
36 = Young Bass (can replace files)
--
38 = Loran/Lauren/ (can replace files)
3A = Tengu
3E = Young Tina
--
--
40 = Hitomi
--
44 = Prairie Dog
46 = Bayman
--
--
--
The Result:
Information thanks to usagiZ
Universal: (DOA2 Dreamcast, DOA2U and DOA3)
80 =
40 =
10 =
20 =
80 + 10 = 90 =
80 + 20 = A0 =
40 + 10 = 50 =
40 + 20 = 60 =
Button checks: (not inputs!)
01 02 =
02 02 =
04 02 =
03 06 =
05 06 =
06 06 =
07 06 =
DOA3 inputs: (All versions of DOA3)
8A 00 =
8B 00 =
8C 00 =
8D 00 =
8E 00 =
8F 00 =
90 00 = BT
91 00 = BT
92 00 = BT
93 00 = BT
94 00 = BT
95 00 = BT
96 00 = or ????
DOA2 inputs: (DOA2U and DOAO)
85 00 =
86 00 =
87 00 =
88 00 =
89 00 =
8A 00 =
8B 00 = BT
8C 00 = BT
8D 00 = BT
8E 00 = BT
8F 00 = BT
90 00 = BT
91 00 = or ????
DOA2 inputs: (DOA2, incomplete)
84 00 =
85 00 =
86 00 =
87 00 =
88 00 =
89 00 =
8A 00 = BT
8B 00 = BT
8C 00 = BT
8D 00 = BT
8E 00 = BT
8F 00 = BT
90 00 = or ????
Conversion: (DOA2U -> DOA3 character.bin)
Directionals = Universal
85 00 -> 8A 00
88 00 -> 8D 00
_ _ 1F -> _ _ 22
_ _ 11 -> _ _ 13
Examples:
DOA3 - Ayane taunt:
F1 00 22 80 03 40 03 80 03 20 00 07 06
DOA2U - Ayane taunt:
F1 00 1F 80 03 40 03 80 03 20 00 07 06
DOA3 - Ayane:
08 01 22 8A 00 12 64 00 02 02 8A 00 13
DOA2/DOA2U - Ayane:
08 01 1F 85 00 10 64 00 02 02 85 00 11
RED- indicates which move-def slot this input activates
GREY- constant for all DOA3 inputs. for 2U this value is always 1F.
GREEN- input directions
PINK- frame input window
YELLOW- button inputs
BLUE- indicate which attack this string is connected to, or comes after.
PURPLE - Seems to be 12 in most cases for DOA3, and 10 in most cases for 2U and DOA2
BLACK- Ending string value
80 =
40 =
10 =
20 =
80 + 10 = 90 =
80 + 20 = A0 =
40 + 10 = 50 =
40 + 20 = 60 =
Button checks: (not inputs!)
01 02 =
02 02 =
04 02 =
03 06 =
05 06 =
06 06 =
07 06 =
DOA3 inputs: (All versions of DOA3)
8A 00 =
8B 00 =
8C 00 =
8D 00 =
8E 00 =
8F 00 =
90 00 = BT
91 00 = BT
92 00 = BT
93 00 = BT
94 00 = BT
95 00 = BT
96 00 =
or ????DOA2 inputs: (DOA2U and DOAO)
85 00 =
86 00 =
87 00 =
88 00 =
89 00 =
8A 00 =
8B 00 = BT
8C 00 = BT
8D 00 = BT
8E 00 = BT
8F 00 = BT
90 00 = BT
91 00 =
or ????DOA2 inputs: (DOA2, incomplete)
84 00 =
85 00 =
86 00 =
87 00 =
88 00 =
89 00 =
8A 00 = BT
8B 00 = BT
8C 00 = BT
8D 00 = BT
8E 00 = BT
8F 00 = BT
90 00 =
or ????Conversion: (DOA2U -> DOA3 character.bin)
Directionals = Universal
85 00 -> 8A 00
88 00 -> 8D 00
_ _ 1F -> _ _ 22
_ _ 11 -> _ _ 13
Examples:
DOA3 - Ayane taunt:
F1 00 22 80 03 40 03 80 03 20 00 07 06
DOA2U - Ayane taunt:
F1 00 1F 80 03 40 03 80 03 20 00 07 06
DOA3 - Ayane
:08 01 22 8A 00 12 64 00 02 02 8A 00 13
DOA2/DOA2U - Ayane
:08 01 1F 85 00 10 64 00 02 02 85 00 11
RED- indicates which move-def slot this input activates
GREY- constant for all DOA3 inputs. for 2U this value is always 1F.
GREEN- input directions
PINK- frame input window
YELLOW- button inputs
BLUE- indicate which attack this string is connected to, or comes after.
PURPLE - Seems to be 12 in most cases for DOA3, and 10 in most cases for 2U and DOA2
BLACK- Ending string value
Changing the values to the new global input slots should work to fix combo strings, but we also need to rearrange the input tables a bit.
You can get to the input tables by following the second pointer at the start of the character.bin

Known Input groupings:
(the way these are ordered doesn't correlate to the offsets in the image)
Non-String
Non-String
Non-String
Non-String
Non-String (holds, usually)
Non-String
Non-String
String
String
String
String
String (holds, usually)
String
String
String Directionals (Helena)
Combo Throws (couldn't get these to work yet)
Combo Holds (these either)
Strings from stances/flips (mostly seen this used for near wall attacks like Hayabusa's 7PP / 7PK)
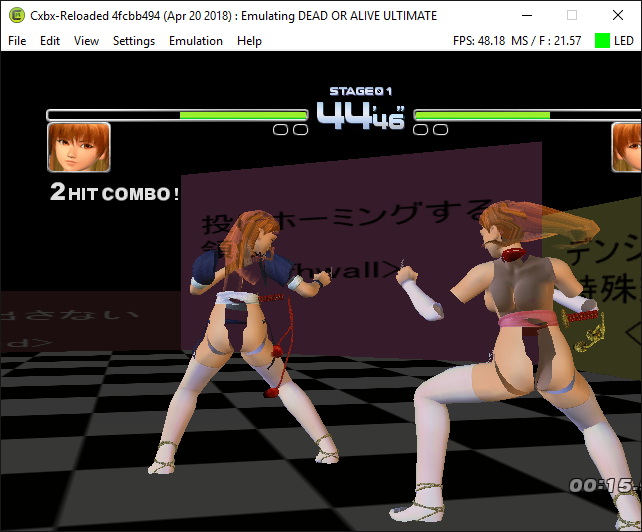
You can get to the input tables by following the second pointer at the start of the character.bin
Here's Ayane from 2U

And Here's Ayane from 3.1

The highlighted section has a bunch of pointers
This chunk of data is 0xC0 bytes in 2U and 0xE0 bytes in 3 (-counting up from the first FF FF 00 00 in both images-) and each pointer leads to another table of pointers for a specific input type:
And Here's Ayane from 3.1
The highlighted section has a bunch of pointers
This chunk of data is 0xC0 bytes in 2U and 0xE0 bytes in 3 (-counting up from the first FF FF 00 00 in both images-) and each pointer leads to another table of pointers for a specific input type:
(the way these are ordered doesn't correlate to the offsets in the image)
Non-String
Non-String
Non-String
Non-String
Non-String
(holds, usually)Non-String
Non-String
String
String
String
String
String
(holds, usually)String
String
String Directionals (Helena
)Combo Throws (couldn't get these to work yet)
Combo Holds (these either)
Strings from stances/flips (mostly seen this used for near wall attacks like Hayabusa's 7PP / 7PK)
The blue marking is the start of the move-definitions (first pointer 88 00 00 00 leads here)
BIN HEADER: (all pointers)
OFFSET 1 0x0 = Move-Definitions
OFFSET 2 0x4 = Input-Definitions Offset Table
OFFSET 3 0x8 = Move Properties (normal,counter,guard,crouching,air, damage, frame data,open/closed stance)
OFFSET 4 0xC = Holds Definitions (which move-def slot to use for each hold)
OFFSET 5 0x10 = ?
OFFSET 6 0x14 = Throws?
OFFSET 7 0x18 = Throw Positioning / damage pointers
OFFSET 8 0x1C = Hold positioning / damage pointers
OFFSET 9 0x20 = Character-Specific Property Definitions
OFFSET 10 - 13 (usually all the same) 0x24 - 0x30 Unknown
OFFSET 14 0x34 = Unknown
OFFSET 15 0x38 = Unknown
OFFSET 16 0x3C = Unknown
OFFSET 17 0x40 = Unknown
OFFSET 19 0x44 = Unknown
OFFSET 20 0x48 = Unknown
OFFSET 21 0x4C = Unknown
OFFSET 22 0x50 = Unknown
OFFSET 23 0x54 = Anim-Def Pointer Table
OFFSET 24 0x58 = Blank (Usually)
OFFSET 25 0x5C = Unknown
OFFSET 26 0x60 = Unknown
OFFSET 27 0x64 = Unknown
OFFSET 28 0x68 = Unknown
OFFSET 29 0x6C = Unknown
OFFSET 30 0x70 = Unknown
OFFSET 31 0x74 = Unknown
OFFSET 32 0x78 = Unknown
OFFSET 33 0x7C = Unknown
OFFSET 34 0x80 = Unknown
OFFSET 35 0x84 = Unknown (this one only exists if the file starts with 88 00 00 00)
- AFS Explorer (Opens up the .AFS files)
- XPR importer for blender (DOA2U and DOA3 .xpr files)
- XPR to EMP converter (Converts DOA2U .xpr -> DOAO .emp)
- MOT blender importer (.MOT animation importer for blender but buggy)
W.I.P Tutorials: (not researched and/or need help!)
-Editing Movesets (DOA2,DOA2U and DOA3)
-Creating custom movesets (DOA2,DOA2U and DOA3)
-Converting movesets
-3D model importing/exporting (DOA2,DOA2U and DOA3)
Last edited:

