
GLoRToR
Active Member
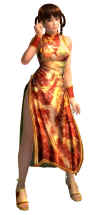
Leifang
http://deadoralive.wikia.com/wiki/Leifang

"This is real T'ai Chi Quan."
—Leifang in Dead or Alive 5
Leifang (レイファン, Reifan) is a college student and T'ai Chi Quan prodigy from the Dead or Alive series, who made her debut in the first Dead or Alive. She is one of the first females to appear in the series, alongside Kasumi and Tina Armstrong.
Throughout the series, she seeks to fight Jann Lee, who is thought to have saved her life at one stage in her past, to prove herself to him that she too is a strong individual. However, Leifang had lost to Jann Lee in almost every tournament, but she managed to defeat him in the last one.
Full Name: Leifang
Known As: The T'ai Chi Quan Genius
Martial Art T'ai Chi Quan
Nationality Chinese
Birthday April 23rd
Age 21
Blood Type B
Height 163 cm / 5'4"
Weight 50 kg /110 lbs
Body Size B87 W55 H86 cm / B34" W22" H34"
Occupation College Student
A girl who grew up in a wealthy famiy from China, Leifang is a good-hearted woman of justice and bares a very independent spirit. Six years before the first tournament, Leifang was saved from a bunch of thugs by a martial artist, Jann Lee. Although she was very grateful for being saved, she felt that she could have handled the situation herself. After that incident, she mastered the art of T'ai Chi Quan and sought to prove her strength to Jann Lee.
 Unique Strikes(Punch) -
Hit Levels - Frames [impact, (framegap) blocked]


http://deadoralive.wikia.com/wiki/Leifang
"This is real T'ai Chi Quan."
—Leifang in Dead or Alive 5
Leifang (レイファン, Reifan) is a college student and T'ai Chi Quan prodigy from the Dead or Alive series, who made her debut in the first Dead or Alive. She is one of the first females to appear in the series, alongside Kasumi and Tina Armstrong.
Throughout the series, she seeks to fight Jann Lee, who is thought to have saved her life at one stage in her past, to prove herself to him that she too is a strong individual. However, Leifang had lost to Jann Lee in almost every tournament, but she managed to defeat him in the last one.
Full Name: Leifang
Known As: The T'ai Chi Quan Genius
Martial Art T'ai Chi Quan
Nationality Chinese
Birthday April 23rd
Age 21
Blood Type B
Height 163 cm / 5'4"
Weight 50 kg /110 lbs
Body Size B87 W55 H86 cm / B34" W22" H34"
Occupation College Student
A girl who grew up in a wealthy famiy from China, Leifang is a good-hearted woman of justice and bares a very independent spirit. Six years before the first tournament, Leifang was saved from a bunch of thugs by a martial artist, Jann Lee. Although she was very grateful for being saved, she felt that she could have handled the situation herself. After that incident, she mastered the art of T'ai Chi Quan and sought to prove her strength to Jann Lee.
Unique Strikes(Punch) - Hit Levels - Frames [impact, (framegap) blocked]
Renkan-Tanben - - HHH - [9(2)18(3)25] / [-5,-9,-4]
Renkan-Tanben - Unshu - - H/M Parry [9(2)18(3)25] / [-5,-9,-4]
Gyokujo-Sensa - Unshu - - HHM -
Renkan-Soan - - HHMM - [15] / [-14]
Renkan-Kinkei-Dokuritsu - - HHM(H+M) - [15] / [-14]
Renkan Hoto Shu - - HHM -
Renkan Renshu Kyaku - - HHMM -
Kotanma, Renkan-Senkyu-Tai -
Renkan, Shinkyaku-Gashu -
Renkan-Tessa -
Seiryu-Soan -
Seiryu-Tekku-Kyaku -
Seiryu-Haisetsu-Ko -
Tanben, Senkyu-Ren-Tai -
Hoto-Suisan - Unshu -
Hoto-Suisan - Zensho -
Senchu-Geki -
Henshin-Tanben -
Henshin-Tanben - Unshu -
Chugeki - Unshu -
Chu-Soan -
Chositsu-Hoshin-Geki -
Juto-Ryoan - (Last P can be held)
Ranzatsui-Sentsuhi -
Ranzatsui-Sentsuhi - Unshu -
Ranzatsui, Senkyu-Ren-Tai -
Ranzatsui, Tessa -
Hoto-Shu -
Shuchi-Ryu - Unshu -
Joho-Shichi-Sei -
Soan -
Sofu-Kanji -
Sofu-Kanji - Unshu -
Shichi-Sun-Ko -
Enshu-Sui -
Gekichi-Sanren-Kyaku -
Gekichi-Haisetsu-Ko -
Sho-Kinda -
Hakkaku-Kyorenshu -
Cho-Shichi-Sei - (While Sidestepping)
- HHH - [9(2)18(3)25] / [-5,-9,-4]Renkan-Tanben - Unshu -
- H/M Parry [9(2)18(3)25] / [-5,-9,-4]Gyokujo-Sensa - Unshu -
- HHM - Renkan-Soan -
- HHMM - [15] / [-14]Renkan-Kinkei-Dokuritsu -
- HHM(H+M) - [15] / [-14]Renkan Hoto Shu -
- HHM -Renkan Renshu Kyaku -
- HHMM -Kotanma, Renkan-Senkyu-Tai -
Renkan, Shinkyaku-Gashu -
Renkan-Tessa -
Seiryu-Soan -
Seiryu-Tekku-Kyaku -
Seiryu-Haisetsu-Ko -
Tanben, Senkyu-Ren-Tai -
Hoto-Suisan - Unshu -
Hoto-Suisan - Zensho -
Senchu-Geki -
Henshin-Tanben -
Henshin-Tanben - Unshu -
Chugeki - Unshu -
Chu-Soan -
Chositsu-Hoshin-Geki -
Juto-Ryoan -
(Last P can be held)Ranzatsui-Sentsuhi -
Ranzatsui-Sentsuhi - Unshu -
Ranzatsui, Senkyu-Ren-Tai -
Ranzatsui, Tessa -
Hoto-Shu -
Shuchi-Ryu - Unshu -
Joho-Shichi-Sei -
Soan -
Sofu-Kanji -
Sofu-Kanji - Unshu -
Shichi-Sun-Ko -
Enshu-Sui -
Gekichi-Sanren-Kyaku -
Gekichi-Haisetsu-Ko -
Sho-Kinda -
Hakkaku-Kyorenshu -
Cho-Shichi-Sei - (While Sidestepping)
Unique Strikes(Kick) - Hit Levels - Frames
Renshu-Kyaku -
Renkan-Senkyu-Tai -
Shinkyaku-Gashu -
Sanren-Kyaku -
Haikyaku, Senpu-Kyaku -
Tenshin-Hairen -
Sokutan-Kyaku -
Senkyu-Ren-Tai -
Tekyaku, Haisetsu-Ko -
Fujin-Tenshu -
Fujin-Tenshu - Unshu -
Fujin-Tessa -
Saju-Bunkyaku -
Cho-Shukyaku - (While Sidestepping)
Renkan-Senkyu-Tai -
Shinkyaku-Gashu -
Sanren-Kyaku -
Haikyaku, Senpu-Kyaku -
Tenshin-Hairen -
Sokutan-Kyaku -
Senkyu-Ren-Tai -
Tekyaku, Haisetsu-Ko -
Fujin-Tenshu -
Fujin-Tenshu - Unshu -
Fujin-Tessa -
Saju-Bunkyaku -
Cho-Shukyaku - (While Sidestepping)
Unique Strikes(P+K/H+K) - Hit Levels - FramesChoshitsu-Hotsui -
Daikinda -
Hoko-Kisan -
Unshu - (Special Stance)
Unshu Tanben - (During Unshu)
Unshu Tanben - Unshu - (During Unshu)
Unshu Tessa - (During Unshu)
Unshu Danchu - (During Unshu)
Gazan-Suishutsu - (During Unshu)
Haisetsu-Ko -
Sentsuhi -
Sentsuhi - Unshu -
Toto-Ho - (Can be held)
Ento-Koda -
Senpu-Kyaku -
Tessa -
Daikinda -
Hoko-Kisan -
Unshu - (Special Stance)
Unshu Tanben - (During Unshu) Unshu Tanben - Unshu - (During Unshu) Unshu Tessa - (During Unshu) Unshu Danchu - (During Unshu) Gazan-Suishutsu - (During Unshu) Haisetsu-Ko -
Sentsuhi -
Sentsuhi - Unshu -
Toto-Ho - (Can be held)
Ento-Koda -
Senpu-Kyaku -
Tessa -
Throws 
Asshin-Ko - (Differs Next To Wall)
Saiwan-Heishin - (Differs Next To Wall)
Wait for the grab but not for the hit. She lets out a different battle-cry to confirm failure or success.
Token-Ko -
Noba-Bunso - (Differs Next To Wall)
Kinkei-Dokuritsu -
Toitsu-Kon -
Roshitsu-Yoho - (Differs Next To Wall)
Heishin-Sui -
Have to input the 46 really quickly or you get 6-Throw.
Ren-Taiko-Chogyo -
Taikuchu-Ken-Ko -
Both of these need to be input during the hit. Better just watch the video below or your training demo.
Rinei-Hisui -
Takuchu-Hisui - (To foe's back)
Joho-Ko - (To foe's back)
Shitsucho-Kohai-Kyaku - (To foe's back)
Teishu-Josei - (To crouching foe's back)
(Differs Next To Wall)Saiwan-Heishin -
(Differs Next To Wall)Wait for the grab but not for the hit. She lets out a different battle-cry to confirm failure or success. Token-Ko -
Noba-Bunso -
(Differs Next To Wall)Kinkei-Dokuritsu -
Toitsu-Kon -
Roshitsu-Yoho -
(Differs Next To Wall)Heishin-Sui -
Have to input the 46 really quickly or you get 6-Throw. Ren-Taiko-Chogyo -
Taikuchu-Ken-Ko -
Both of these need to be input during the hit. Better just watch the video below or your training demo.Rinei-Hisui -
Takuchu-Hisui - (To foe's back)
Joho-Ko - (To foe's back)
Shitsucho-Kohai-Kyaku - (To foe's back)
Teishu-Josei - (To crouching foe's back)
Holds 
Jodan-Ransui - (High-Kick or Punch Parry)
_ Chudan-Ransui - (Middle-Kick or Punch Parry)
Sodan-Ransui - (Low-Kick or Punch Parry)
I messed with the names here, this is not how it's displayed but it's easier to see her hold potential.Kaisei - (Middle-Kick Hold)
Heishin-Geki - (Middle-Punch Hold)
Honshin-Kato-Haisetsu - (High-Punch Hold)
Honko-Yoshin-Geki - (Middle-Punch Hold)
Ranjakubi - (Low-Punch Hold)
Tenshin-Ryugeki-Hairaku - (High-Kick Hold)
Kongo-Fujin-Kyaku - (Mid-Kick Hold)
Moko-Odato - (Low-Kick Hold)
Backturned 
Seiryu-Soan - (With back to foe)
Seiryu-Tessa - (With back to foe)
Seiryu-Haisetsu-Ko - (With back to foe)
Sentsu-Hai - (With back to foe) (Can be held)
Hai-Jodan-Ransui - (With back to foe) (High-Kick or Punch Parry) _
Hai-Chudan-Ransui - (With back to foe) (Middle-Kick or Punch Parry)
Heishin-Haitetsu-Ko - (With back to foe - Next to wall) (Middle-Punch Parry)
Seiryu-Tessa - (With back to foe)
Seiryu-Haisetsu-Ko - (With back to foe)
Sentsu-Hai - (With back to foe)
(Can be held)Hai-Jodan-Ransui - (With back to foe) (High-Kick or Punch Parry)
_ Hai-Chudan-Ransui - (With back to foe) (Middle-Kick or Punch Parry)
Heishin-Haitetsu-Ko - (With back to foe - Next to wall) (Middle-Punch Parry)
Taunts
Taunt: Getting Tired? -
Taunt: Up For More? -
Taunt: Gotcha! -
Taunt: Your Move! -
Taunt: Easy, Too Easy! -
Taunt: Up For More? -
Taunt: Gotcha! -
Taunt: Your Move! -
Taunt: Easy, Too Easy! -
Credits: @BloodBurger
http://www.twitch.tv/emperorcow/b/395137629
Leifang How-To
Credits: @EMPEROR_COW
Pokes: Basic Pokes (OnImpact, OnHit, OnBlock) i10 +3h -5b i11 -3h -14b NOTE: Reverse mixup with which is +20h -5b i12 -12h -8b NOTE: Reverse mixup with which is -8b +45h i12 i13 i13 i13 Pokes: Range Pokes (OnImpact, OnHit, OnBlock) Pokes: Safe Pokes (OnImpact, OnHit, OnBlock)Being -5 at most these pokes are safe even being thrown.
Basically you can't throw her and she can hit a button and
she can punish the opponent.
Throws are the fastest moves in the game and grapplers like
Leifang have a i5 throw. Non-grapplers have i6 throws.
You have to add a frame to every move for startup in DoA5.
So a move that is -5 is safe from non-grapplers, but not from
Leifang, Bass, Bayman, Mila, Tina, Lisa!
-5b -4b -4b (BT so backdash!) -5b -5b -4b -4b -5b -5b The last kick is a mid and on CH it's bounce from ground. -5b(Unshu)
-4b (Can get crushed) -5b(BT)
High crush(SS)
-5b 0b![] +11 +5 (Distance Dependent) +2 Close Hit, +6 Tip Range(PB)
+17 +5 +5Power Blow (
) is +17 Set-ups:
PB(blk)6k,3k6P+K
PB(blk)6pkp2k
Medium kick mixup followups.
Pokes: Crushes (OnImpact, OnHit, OnBlock)Low Crushes:
(Timing: Have to delay it!)High Crushes:
(BT)
(Timing: Have to delay it!) Tracking Moves (OnImpact, OnHit, OnBlock) Pokes: Guaranteed Followups (OnImpact, OnHit, OnBlock)(GB)
~ (Wall)(CH)
[Faint] Setup -
Mixup: [Faint]
~ (Very long stun) ?
(CH)
(+24) Sitdown stun on crouching opponent.~
:Shoulder tackle <~ Strict.~
: <~ They expect the low kick so you go: (Enemy Low Hold) ~ +24 CS!(It's her sabaki)
Sitdown stuns, fastest stagger escape only midpunch stun but otherwise they're good. Her launchers are quite slow.
: +22 +22 Launchers (OnImpact, OnHit, OnBlock)They're fairly slow.
Normal Hit Launchers
(Higher launch on ch) (enters BT) (enters BT)(BT)
(enters BT) (enters BT) on CH ~ etc(BT)
Counter Hit LaunchersCH
CH
CH
CH
CH
CH
CH Hold(
) Also a high crush - it's a mid.CH
CH
CH
~ CH
CH
CH
Ground Bounce CH Launchers - Force tech guaranteed!
CH
CH
CH
CH
Sabaki (OnImpact, OnHit, OnBlock)A strike that parries at its early frames.
Benefit: Allows for critical burst faster.
(vs Mid or ) (vs Mid or ) (vs High or ) <~ This is her Critical Burst, mind! Throws (OnImpact, OnHit, OnBlock)Grappler - has faster throws at i5.
. i5 i7 ~> In certain situations vs Lisa or Ayane it puts her in a bad situation because they have wakeup tech that beats the stomp followup. vs Crouching. i5 Offensive Holds (OnImpact, OnHit, OnBlock)Throws with hold properties.
They beat strikes but lose to normal throws.
+150% dmg - hicounter thrown though so be careful.
- i16 Beats all highs, mids, and any standing low. (6H+P) i20 i20 vs Crouch / standing low. Good against Lisa's stupid tracking mid crouching punch move. Beats any low strike with a crouching animation Holds (OnImpact, OnHit, OnBlock)Jack of all trades:
Lei has everything at a decent level!
Advanced Holds - They deal more damage.
High Punch Mid Punch Low Punch High Kick Mid Kick (Puts them in BT and deals damage.) Low KickSetups from Mid-Kick Holds
~
[128dmg]!~
[99dmg] - a lot more damage, because of the frame data, the first hit doesn't register as part of the combo damage so adding the advanced hold damage to it, you get [+20dmg] and with a HiCounter, it's [+30dmg] so a total of 129dmg!~
[101dmg] + Adv. Hold dmg!~
(...) Guaranteed Critical Burst, except on fastest stagger escape.~
CB, last hit not guaranteed.~
: (...)Parries
vs High Punch/Kick +16f adv. vs Mid Punch/Kick +16f adv.All lead to +16 but mid P parry switches sides.
They can NOT be used when in stun.!
Followups: Guaranteed off of mid-kick parry.~ combo into the faint stun as follows:
~ untechable knockdown:
~ reset situation where you go:
(CB!) because the opponent cannot H after Faint Stun.~ Or if the opponent tends to hold low you can go:
Launcher~ Or you can go:
:This parry puts them into a mixup.
(1:55:22 http://www.twitch.tv/archive/archive_popout?id=395137629&t=2972s )Because it switches sides, you are not comfortable going for 6k and you might end up going for 4k by mistake. 4kk does combo but the stun is not as good. Learn about the stance change and how to make 6k happen every time.
Stance: UnshuBeats mid and high punches ONLY.
Options:
(High) (Low) (Mid) (Offensive Hold)Getting into it:
(Unshu)
What makes Unshu so good, is
1. Unshu Offensive Hold leads to:
(Unshu)
~ :9K: (69dmg)(Unshu)
~ (CB Set up!) P:its mixup is launcher with:
(Unshu)
~ ~2. Unshu manages to put the opponent vulnerable to CB by one less hit, but only if you successfully parry something with it. Not guaranteed!
~ ~ ~ ~The opponent can stagger escape the sliding low kick, (unshu 2k or 2H+K) it's unsafe but a good mindgame. So many ways to get into it.
P+K:: ~~
~
~
Low hold or blocking it is bad, but it's a great spacing tool or when they walk backwards.
If they do not stagger escape,
: ~ is guaranteed. Critical Burst Setups(Unshu)
~ (vs H/M Punch Unshu)
, or (Parry)
They have two chances to guess -They can only guess the feint stun and the cb.
(Mid K Hold)
(CB Setup guaranteed on Fastest Stagger Escape)(Mid K Hold)
(Last hit NOT guaranteed.)(Sabaki) or or , (Sabaki) and the above.(Sabaki) and the above.One of the fastest ways to go into CB from normal hit:
~not very practical but it works, not safe:
~ ~ <~ Does this work with P?Mix it up with going for a launcher instead
Other CB Possibilities:
Jug(.)(.)glesEnding with
better than but K puts them closer. low juggles for example: ~ You can also do
twice and still get the low juggle. follow up into situationsCriticalBurst Combo (Follow ups after CB)
(CB)
, ~~
~
(Force tech vs light only)~
(Untechable) (vs heavy opponents)(CB)
(BT) , (vs light) (vs mid when CB is from open stance) Force Techs:When you force the opponent to get up from the ground and guard.
Light/Mid/Heavy weight: (Counter)
, Light/Mid weight: (Counter)
(BT) Heavy Weight: (unshu)
Light Weight: (CB),
, , Heavy/Mid Weight:
, Follow up force techs with the
throws.
Last edited: